We all have been at the field and have been frustrated putting the wings on a Cub, trying to hold it while installing screws. You really feel the pain on the BalsaUSA Cubs. What I’m about to show you can be made to work on any Cub on the market. It works best when you are building, but can be done to a prebuilt Cub. I have been using this setup on my Cubs for years now.
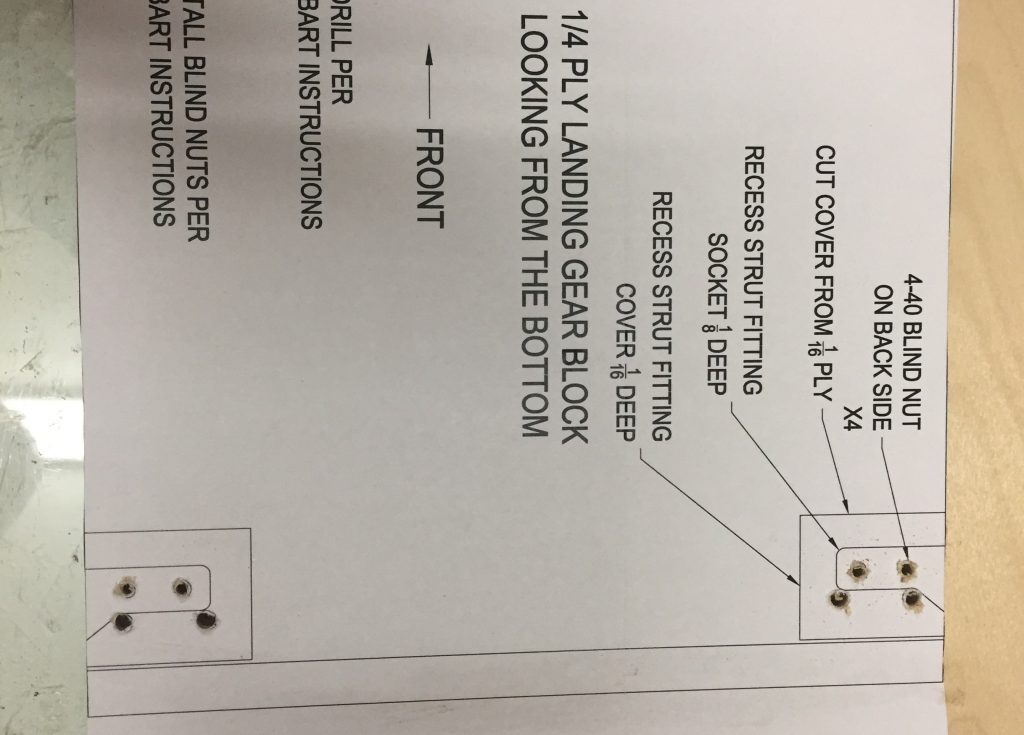
The photo below is from the template from the plans of my 1/3 scale Super Cub.
Somewhat a typical 1/4 inch play landing block with setup for Robart gear. You will notice some cut out shapes to the back of the block. This can be done free hand with a Dremel tool and a Dremel 652 Straight Router bit. Its best to have the router attachment like below. Drill all holes before beginning the project For the tab, drill large enough for a 4-40 bolt to pass thru.
First step is to make the slots for the struts tabs. I make the tab slots just a hair over 1/8 deep. Then the outer square spot is 1/16 deep. Like below.
Now using 1/16 aluminum stock lets make the strut attachment tabs.
Next make the 1/16 covers from ply and glue in place. Use caution to not get any glue on the tab or inside the slot.
Now with the tabs in, lest drill the holes. Now from the holes you drilled above, drill from the back side thru the assembly a hole big enough for a 4-40 bolt. Remove strut tab and clean any burrs from drilling. Now in the 1/16 ply covering drill holes large enough for the head of the 4-40 bolt to pass thru. This will allow in the full assembly for the head to be recessed down almost flush. Install blind nuts to the back side and lock in with epoxy.
So the finished project should look like this.
So now when you slide the wing out you just slide the tab into the slot. It will be self support while to attach the wing bolts Then just put your two 4-40 bolts in and the struts are ready to go. Below is the nice scale look.